SSO Azure Active Directory Open ID Integration
There are many ways to enable security for your app in WaveMaker. You can use Azure Active Directory (Azure AD) which is a Microsoft cloud-based identity and access management service. This document helps you to enable SSO services using Azure AD with Open ID integration. Follow the steps below to configure it.
Registering your application in Azure AD
- Go to App Registrations.

- Click New registration.

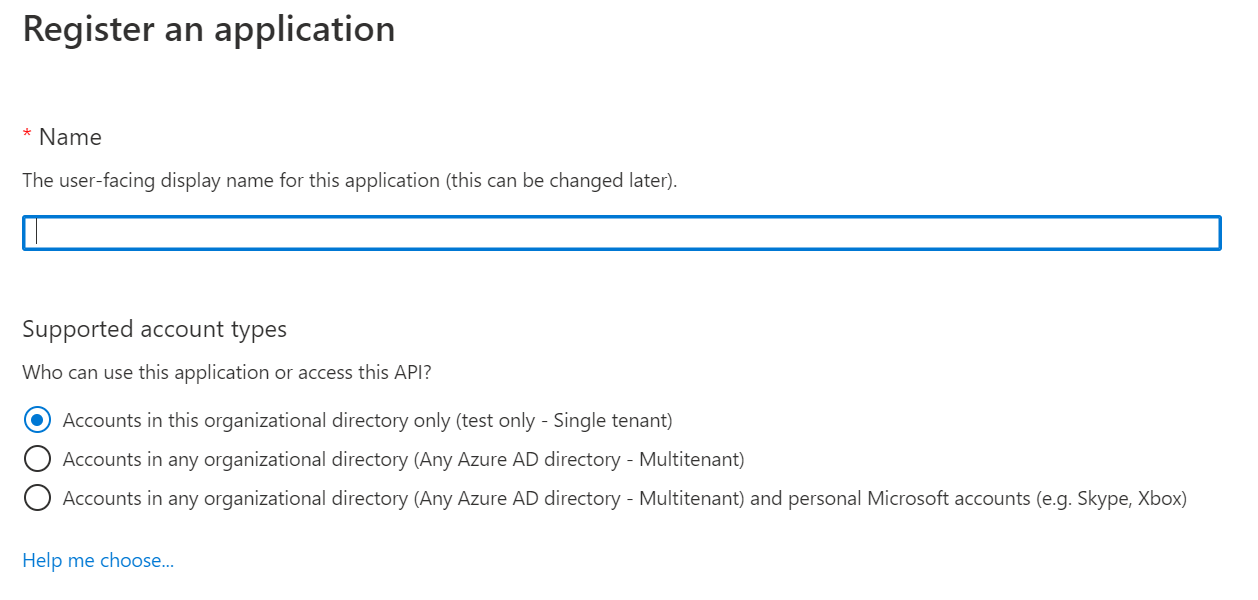

Registering the Application
- Name: Enter the application name.
- Supported account types: Select the type of account to give permissions on the application.
- Redirect URL: Provide a redirection URL (optional).
Application Settings
- Go to Enterprise applications.

- Select the application which you created.
- Select the Assign users and groups option.
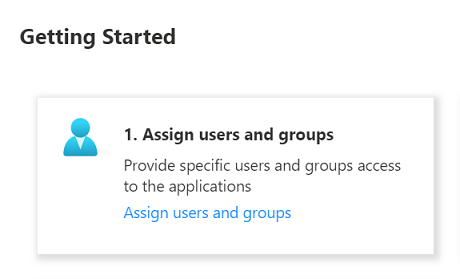
- Click Add User to add the domain users to give permissions.
Note these details
You'll need the following details for enabling security for WaveMaker application.
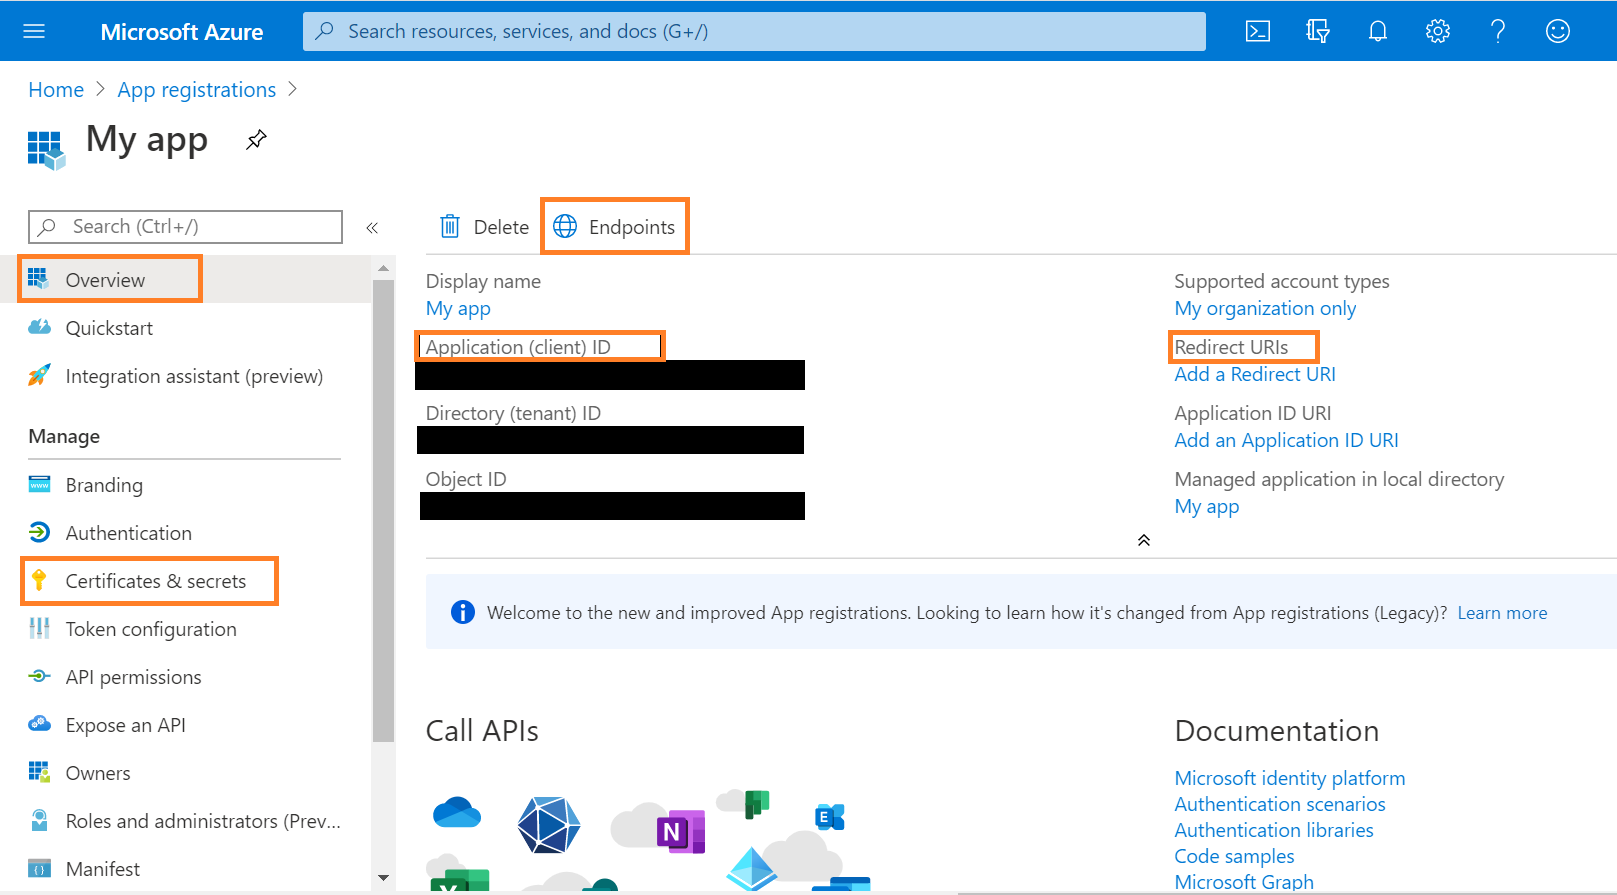
Client ID
- Go to App Registrations.
- Click on the app to access all necessary authorization details.
- Note the Application (client) ID for the app that you created.
Endpoints
- In the App Overview page, select the Endpoints option.
- Go to the OpenID Connect metadata document.
- Copy and paste the URL in a browser; it will display data in JSON format with OpenID connection URLs. This information will be used in OpenID Configuration Setup in WaveMaker.
Certificates and Secrets
You can upload certificates and related information in the Manage section of app settings under the Certificates & Secrets option.
- Click New client secret, and select the Duration; for example, Expires in 1 year. Note the generated secret value.(see here for details)
Open ID Configuration Setup in WaveMaker
- Open a WaveMaker project.
- Go to the Security settings of the project.

- Go to the Authentication and Authorization tab.

- In the Authentication section, go to Security Providers, and select Open ID from the dropdown.
- Enter the Provider details in the following section.
1. Identity Provider Information
You'll need the the Endpoints from OpenID Connect metadata document.
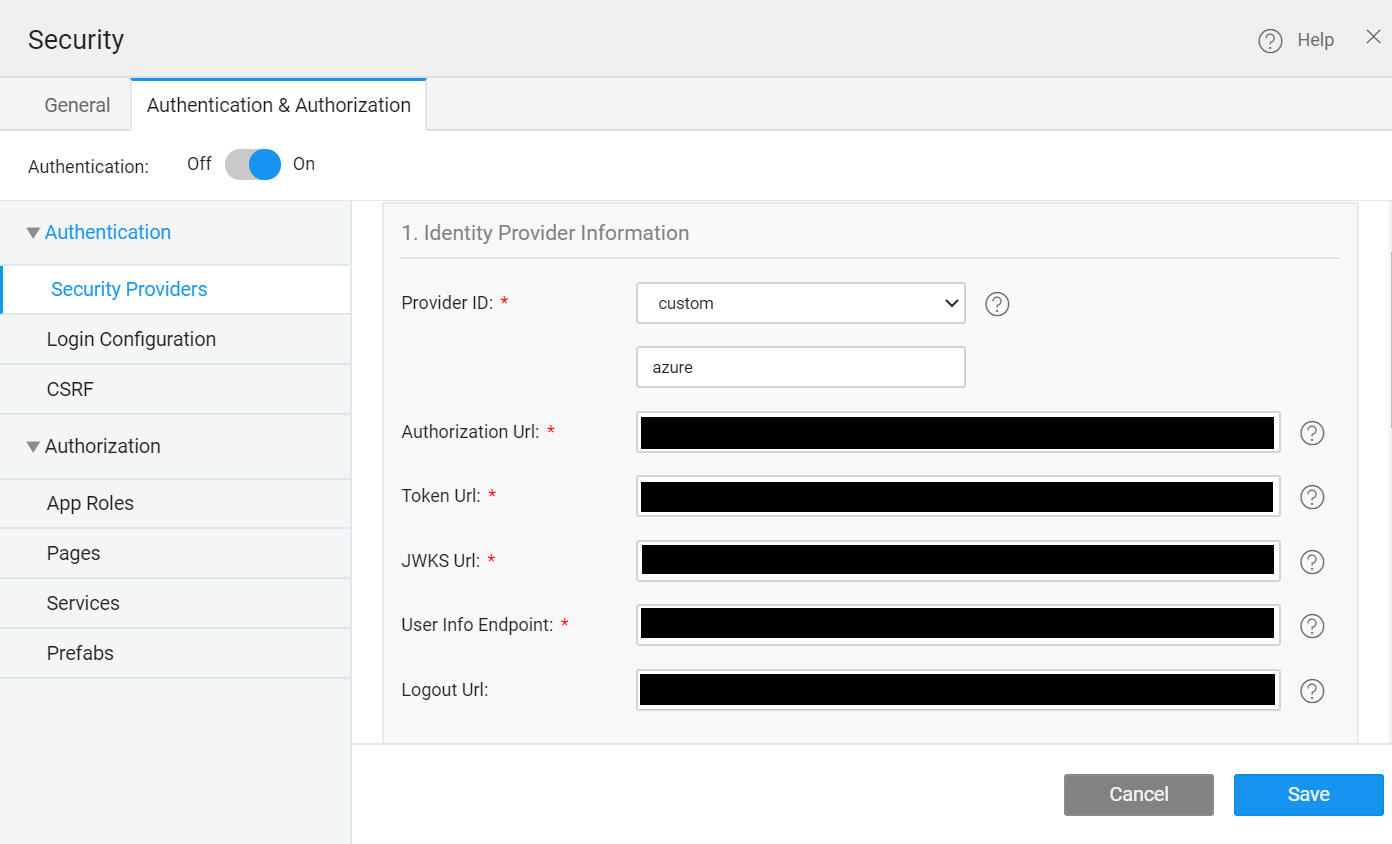
- ProviderID: Select the Custom option and Enter the Provider Name. For example, azure.
- Authorization Url: Enter the
authorization_endpointURL specified from the metadata document. - Token Url: Enter the
token_endpointURL from the metadata document. - JWKS Url: Enter the
jwks_urifrom the metadata document. - User Info Endpoint: Enter the
userinfo_endpointURL from the metadata document. - Logout Url: Enter the
end_session_endpointURL from the metadata document.
2. Service Provider Information
- Redirect Url: Go to the app overview page in Azure AD, and enter this URL in the Redirect URLs section.
3. Integration Information
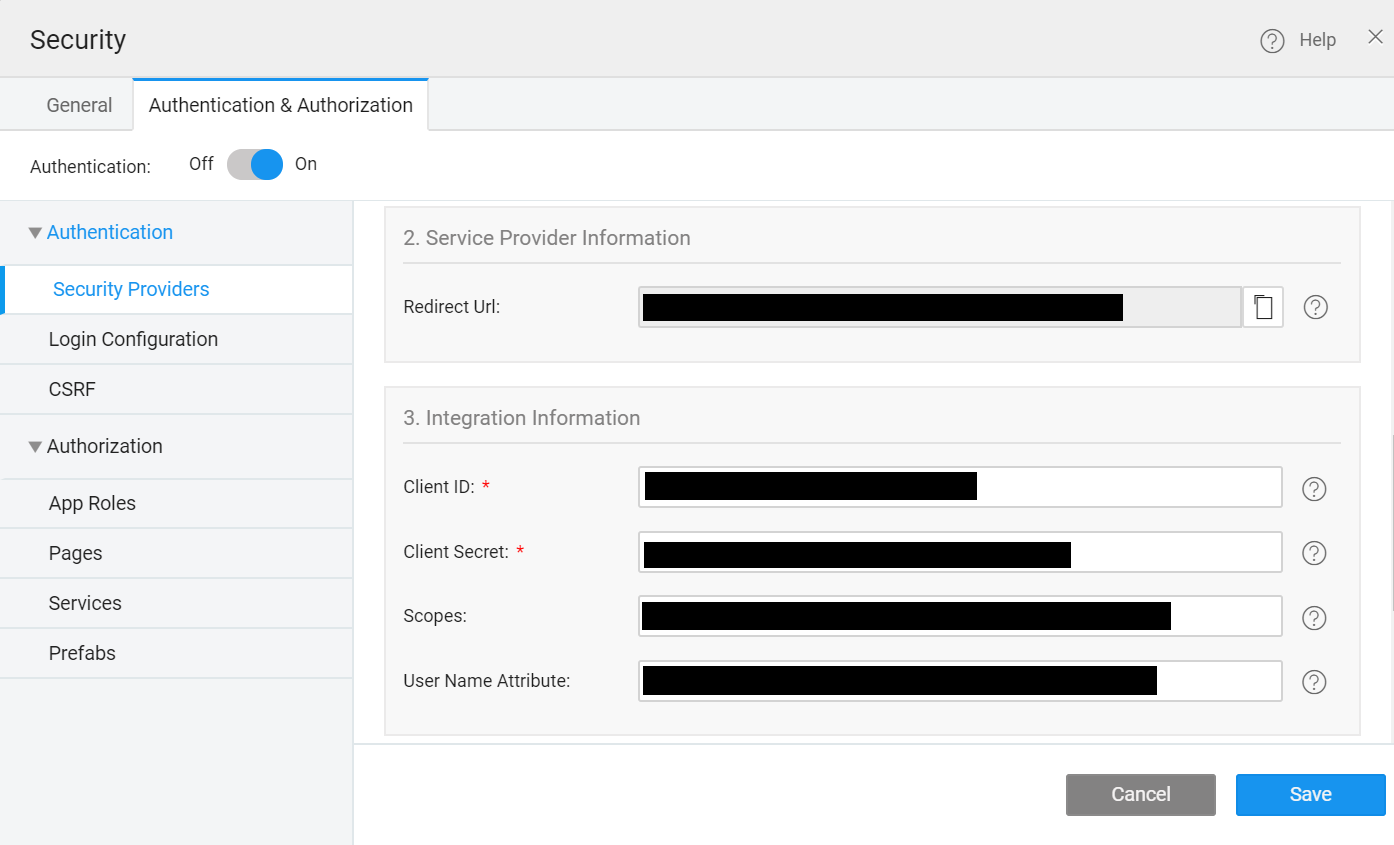
- Client ID: Paste the Client ID of the app created in Azure AD.
- Client Secret: Paste the Client Secret Value generated in Certificates and Secrets.
4. Role Mapping
You can assign the roles to the logged-in user by selecting OpenID, or Database. If you select the provider as a Database, the configuration is similar to the WaveMaker standards. You just have to keep in mind that the user against whom the roles will be linked is the one returned by the Active Directory query.
For more information about role mapping, see Role Mapping in OpenID
See Also
Aunthentication in WaveMaker
Quickstart: Add sign-in with Microsoft to a Java web app
Authorize access to web applications using OpenID Connect and Azure Active Directory